Blood Pressure Measurement Techniques: Best Practices for Accurate Readings
Blood pressure (BP) measurement techniques are among the most common yet critical procedures in clinical practice. They provide valuable insights into a patient’s cardiovascular health, helping clinicians diagnose hypertension and monitor treatment efficacy. However, even slight deviations in best practices for blood pressure measurement can compromise the accuracy of readings, leading to potential misdiagnosis. From improper technique to inadequate equipment, several factors can impact the precision of accurate readings. In this blog, we will explore the best practices for obtaining accurate blood pressure measurements, whether in clinical settings or at home.

Blood Pressure Measurement Technique: Best Practices for Accurate Readings
Blood Pressure Measurement Technique:
1. Selecting the Right Equipment for accurate readings
The accuracy of blood pressure measurement begins with the right tools:
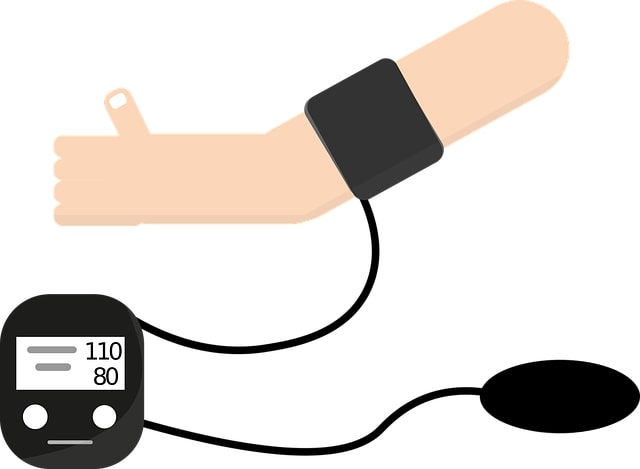
- Automatic Cuff vs. Manual Cuff: The automatic cuff is the most commonly used device, providing ease of use and consistent readings for most users. However, clinicians still use manual (aneroid) sphygmomanometers in many settings, as they offer precise control and can be ideal for certain patients.
- Cuff Size: Using the correct cuff size is crucial. If the cuff is too small or too large, it can yield inaccurate readings. The American Heart Association (AHA) recommends:
- Small adult cuff: 22–26 cm
- Standard adult cuff: 27–34 cm
- Large adult cuff: 35–44 cm
- Thigh cuff: 45–52 cm
2. Positioning the Patient Properly for accurate readings
Positioning significantly affects blood pressure readings. To ensure accuracy, follow these steps:
- Seated and Relaxed: The patient should be seated in a chair with their back supported, legs uncrossed, and feet flat on the ground. This position helps maintain a steady heart rate and prevents spikes in blood pressure
- Arm at Heart Level: The arm where the cuff is applied should be relaxed and supported at heart level. If the arm is too low or too high, readings may be artificially high or low.
- Bare Arm: The cuff should be applied directly on the skin, avoiding clothing, as fabric can interfere with the reading.
3. Rest Before Measurement
It is recommended to let the patient rest for at least five minutes before taking a reading. This minimizes the effects of recent activity or stress, which can elevate blood pressure. Additionally, the patient should avoid exercise, caffeine, or smoking at least 30 minutes before the test, as these factors can also skew results.
4. Taking Multiple Readings
Blood pressure fluctuates throughout the day due to various factors like stress, diet, or physical activity. To get an accurate measurement, multiple readings should be taken:
- Two to three readings should be obtained at intervals of 1-2 minutes. If the first reading is high, wait a few more minutes and take another. The average of these readings will provide a more accurate baseline(
- In a clinical setting, it’s ideal to measure BP once at the beginning of a visit and again at the end to account for “white-coat hypertension,” a temporary spike in blood pressure due to the stress of being in a medical environment.
5. Use Both Arms Initially
Blood pressure readings can vary between arms. It’s good practice to measure BP in both arms during the initial visit. If there’s a significant difference between readings, clinicians typically use the higher reading for future measurements.
6. Minimize Patient Movement and Conversation
During the measurement, it’s essential that the patient stays still and refrains from talking. Movement or conversation can temporarily raise blood pressure, leading to inaccurate readings. Additionally, make sure the cuff is properly positioned and not too tight, as this can also affect the outcome.
7. Home Monitoring Tips
For patients monitoring their blood pressure at home, consistency is key:
- Time of Day: Try to take measurements at the same time each day, such as in the morning or evening, to establish a baseline.
- Device Calibration: Ensure the home BP monitor is calibrated regularly for accuracy. Many patients prefer Bluetooth-enabled devices that connect to apps for easy tracking, but simplicity and reliability are more important than fancy features(
8. Interpreting Blood Pressure Results
Understanding the numbers is just as critical as obtaining them. Here’
s a quick guide:
- Normal: <120 systolic and <80 diastolic mm Hg
- Elevated: 120-129 systolic and <80 diastolic mm Hg
- Hypertension Stage 1: 130-139 systolic or 80-89 diastolic mm Hg
- Hypertension Stage 2: ≥140 systolic or ≥90 diastolic mm Hg
- Hypertensive Crisis: ≥180 systolic or ≥120 diastolic mm Hg (requires immediate medical attention)
Conclusion
Accurate blood pressure readings are critical for diagnosing and managing conditions like hypertension, heart disease, and stroke risk. By following best practices—using the right equipment, ensuring proper positioning, and taking multiple readings—you can ensure reliable results, whether you’re a healthcare professional or monitoring at home. Regular monitoring and tracking trends in blood pressure over time are vital steps toward improving cardiovascular health.


Leave a Reply